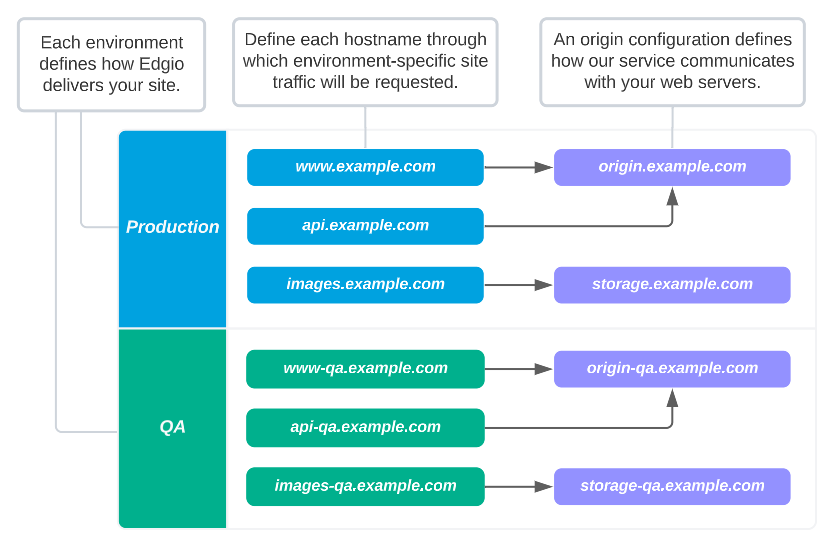
You must register each hostname (e.g., cdn.example.com) that will be served through the Edgecast network. Each hostname is mapped to an origin configuration. An origin configuration defines how our service will communicate with your web servers.
CDN-as-Code Only: If you are using CDN-as-code, then you should manage your hostnames within your edgio.config.js. Deploying your CDN-as-code configuration will update the set of hostnames listed on the Hostnames page.
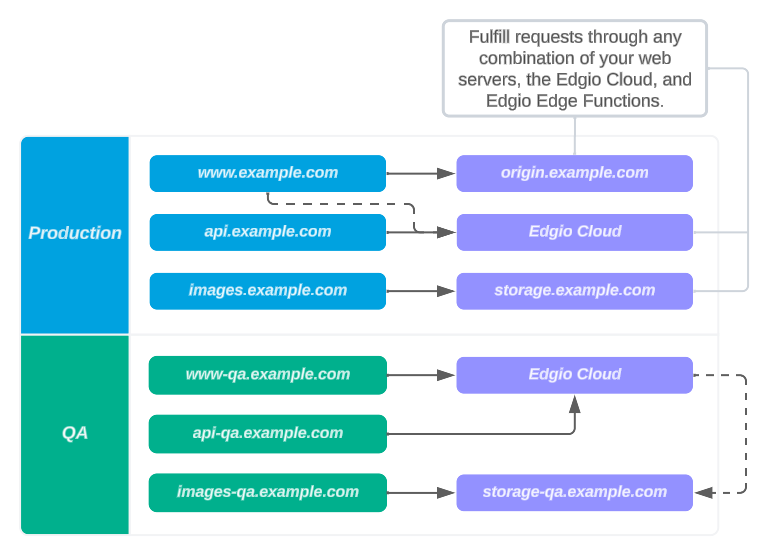
If you are using CDN-as-code, then you may serve your site through any combination of your web server(s), the Edgecast cloud, or Edgecast Edge Functions.
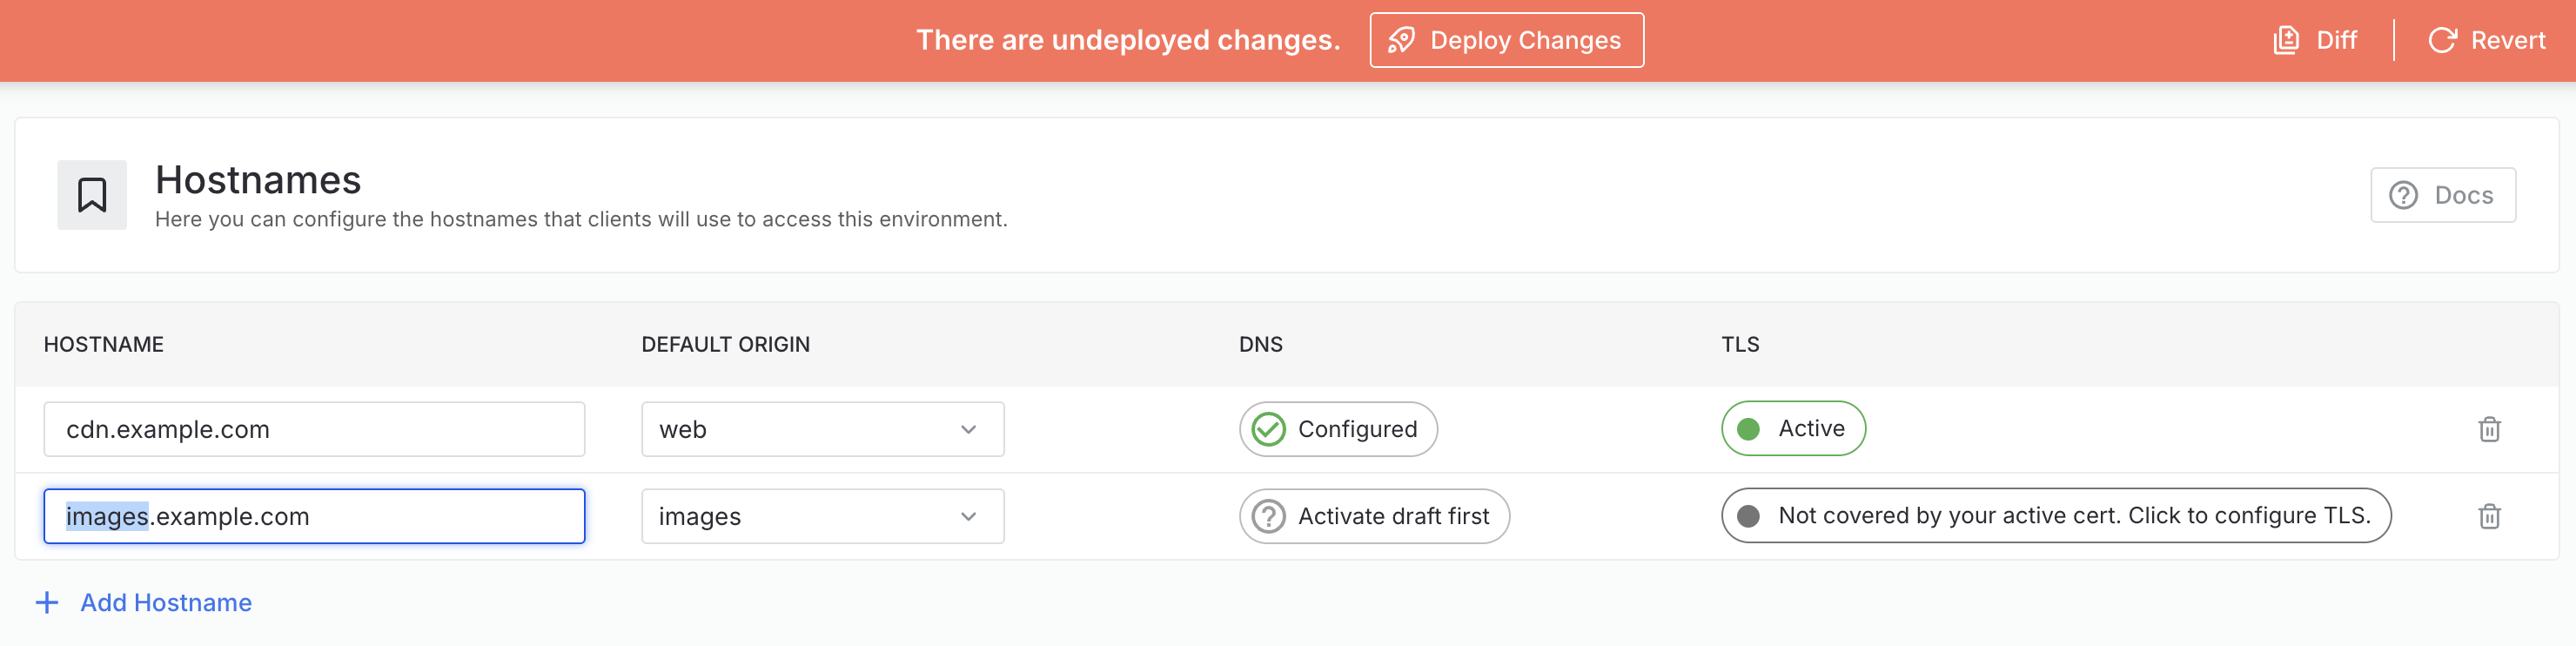
On a per environment-basis, define each hostname that will be served through Edgecast.
Key information:
Specify hostnames using lower-case letters.
Hostnames must be unique across all environments.
For example, if you have defined www.example.com within the production environment, then you cannot define it within any other environment until you delete it from the production environment.
Each hostname is mapped to an origin configuration. By default, Edgecast proxies cache misses for that hostname to that origin configuration. Override this mapping through the Set Origin feature.
CDN-as-Code Only: If you are using CDN-as-code, then your routes determine the source from which data will be retrieved. Define an origin configuration as a source through the set_origin feature.
Set up support for HTTPS delivery for each of your hostnames.
Once you are ready to serve traffic through Edgecast, update the hostname’s DNS configuration to point to our service.
If your hostname is at the zone apex (e.g., example.com), then you will need a DNS service provider that supports defining a CNAME record at the zone apex. Learn how to set this up through Route.
It is strongly recommended to point your DNS away from Edgecast for hostnames that are no longer registered within your account. For example, this may occur when you modify or delete a hostname. Learn more about hostname offboarding.
To add, modify, or delete hostnames from an environment through the Edgecast Console
Load the Hostnames page.
From the Edgecast Console, select the desired private space or organization.
Select the desired property.
From the left-hand pane, select the desired environment from under the Environments section.
From the left-hand pane, select Hostnames.
Perform one of the following steps:
Add a Hostname:
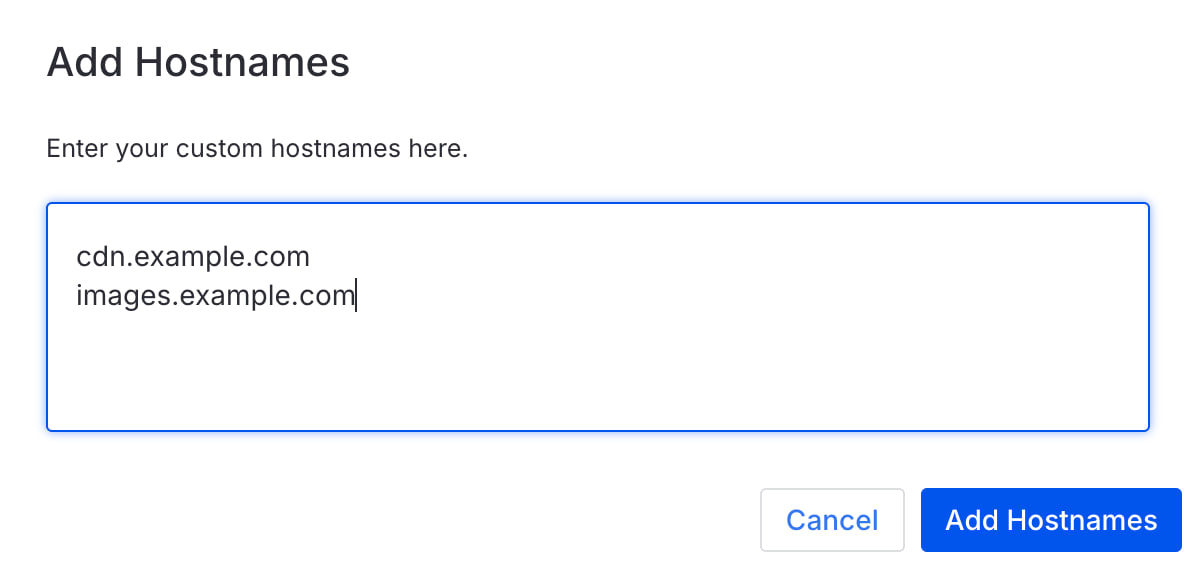
Click + Add hostname.
Add each desired hostname on a separate line.
Click Add Hostnames.
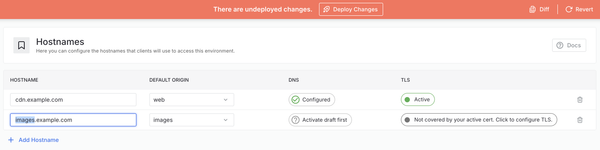
Assign an Origin: Map a hostname to a different origin by selecting the desired origin from under the Default Origin column.
The Default Origin column is read-only when the current property only contains a single origin configuration (e.g., web).
Modify a Hostname: Modify an existing hostname by replacing the existing hostname with a new value.
Delete a Hostname: Click next to the hostname that should be deleted.
Repeat step 2 as needed.
If you are finished making changes to this environment, click Deploy Changes.
Each hostname requires the installation of a TLS certificate on our network. Set up TLS support through either of the following methods:
Automatic Installation: Edgecast can automatically generate and install a TLS certificate when both of the following requirements are met:
Certificate Authority Authorization: The Let’s Encrypt certificate authority (CA) must be allowed to issue certificates for that hostname. It is allowed to issue certificates when either of the following conditions are true:
A CAA record has not been issued for that hostname or a parent hostname. This DNS configuration means that any CA is allowed to generate certificates for that hostname.
A CAA record explicitly allows the Let’s Encrypt CA to generate certificates for that hostname.
This sample CAA record indicates that the Let’s Encrypt CA is allowed to issue certificates for cdn.example.com:
cdn.example.com. CAA 0 issue "letsencrypt.org"
Domain Control Validation: Prove your control over that domain by adding an _acme-challenge CNAME record to it.