Get started with Edgecast by performing these steps:
Step 1: Create an Edgecast Account
Signing up for an Edgecast account is free and quick.
-
- Manually creating an account.
- Provide your name, email (user name), and a password. Click Create Account.
- Check your email for confirmation instructions. Click CONFIRM MY ACCOUNT to load the Edgecast Console.
- Using your existing Github or Google account. You will need to log in to Github or Google and then authorize linking Edgecast to your account.
- Manually creating an account.
-
Click Accept to accept our terms of service and privacy policy.
Step 2: Create an Edgecast Property
Each website that will run behind Edgecast requires an Edgecast property. A property determines how Edgecast will process your website’s traffic. Setup for a new property varies according to your needs.
I would like to:
-
Connect Edgecast to a project that uses a web application framework.Manage your CDN configuration alongside your code. This approach is known as CDN-as-code. Choose from one of the following options:
- Automate deployments and branch previews for a Next.js, Nuxt3, Astro, Remix, Qwik, or Vue project by connecting your Github repository to Edgecast.
- Manually deploy changes to your CDN configuration through our CLI.
-
Use Edgecast to serve traffic for a site that is hosted on your web server(s).For example, you may serve traffic for content that is available through web hosting or virtual cloud services. Choose from one of the following options:
-
Manage and deploy changes to your CDN configuration through the Edgecast Console.This is the recommended option if you do not plan on using Cloud Functions, predictive prefetching, or an integration for a web application framework, such as Next.js, Nuxt3, Astro, Remix, Qwik, or Vue.
-
Manage and deploy changes to your CDN configuration through our CLI.
-
-
Interact with a sample Next.js, Nuxt3, Astro, Remix, Qwik, or Vue project on Edgecast.Set up a sample project by autogenerating a Github repository and connecting it to Edgecast. This project takes a CDN-as-code approach for CDN configuration management.
Creating a Property (Edgecast Console)
Manage and deploy changes to your CDN configuration through the Edgecast Console.
Although we do not recommend managing your CDN configuration using both the Edgecast Console and our CLI, you may switch to a CDN-as-code approach at any time. Switch to a CLI-based approach to CDN configuration by initalizing an existing property within your project’s root directory and then deploying the desired changes.
-
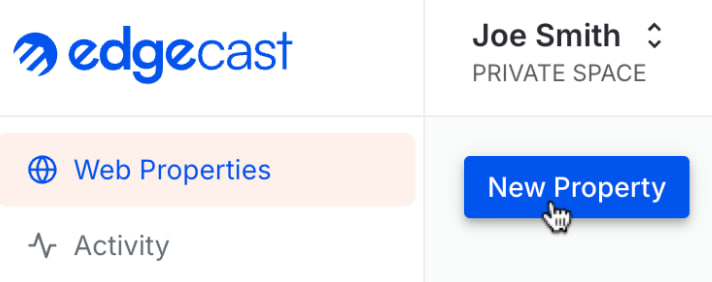
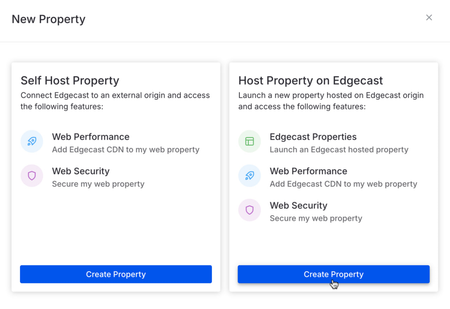
From the Edgecast Console, click New Property.

-
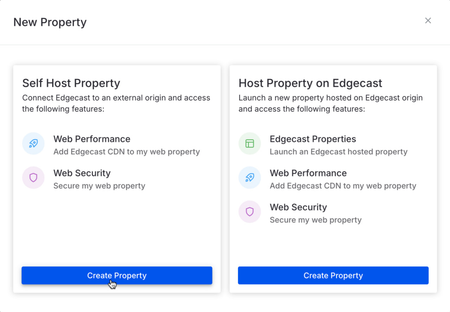
From under the Self Host Property, click Create Property.
-
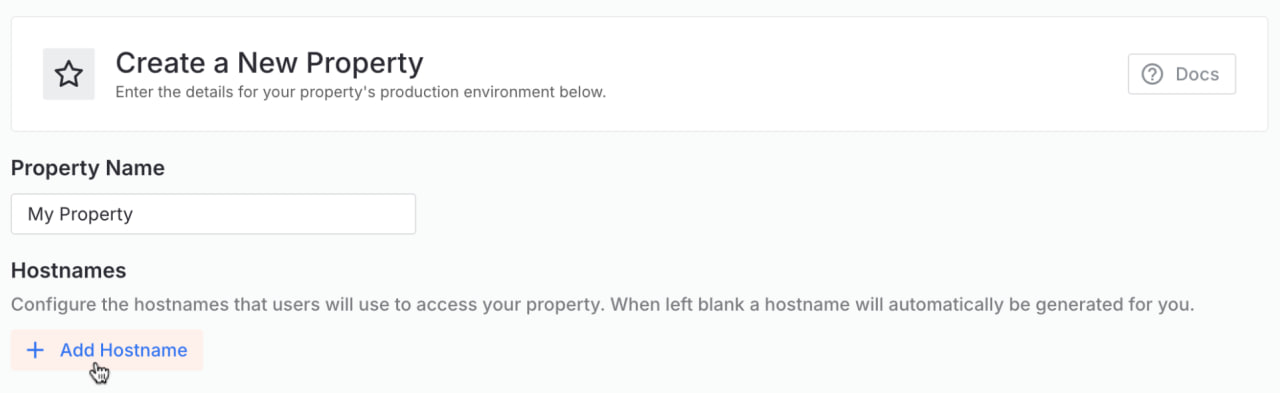
In the Property Name option, assign a name to your new property (e.g.,
My Property). -
Under the Hostnames section, click + Add Hostname and then type a domain (e.g.,
www.example.comorcdn.example.com) that will be served through Edgecast.
-
An origin configuration identifies a set of web servers that will serve as the source for the content served through Edgecast.Perform one of the following steps:
-
Origin: Define the set of web servers that will serve as the origin for the hostname defined in step 3 by setting the Origin Hostname option to a domain or an IP address (e.g.,
www-origin.example.comor192.0.2.222) that points to them.You may safely ignore the other origin settings until you are ready to fine-tune your setup. Learn more about origins.Your origin configuration should now look similar to this: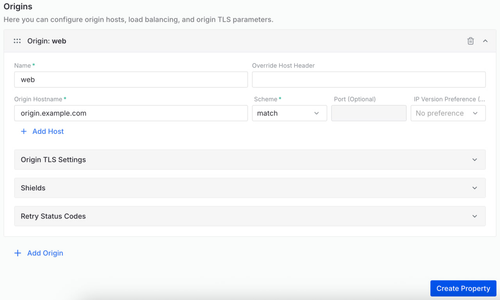
-
-
Click Create Property.
-
If you have defined at least one origin configuration, your property will be automatically deployed to the Edgecast network. Proceed to Step 3: Test Your Property.


Creating a Property (CLI with Automation)
If your existing project is stored within a Git repository and it is powered by Next.js, Nuxt3, Astro, Remix, Qwik, or Vue, then you can automate branch previews and deployments. Specifically, we will automatically create a
default environment for pull requests and a staging environment for push events. If you create a release, Edgecast will deploy to the production environment. If that environment does not already exist, then Edgecast will automatically create one.If you plan on using releases to deploy changes that affect your production traffic, then you should tag the production environment as the one that will serve production traffic.
-
From the Edgecast Console, click New Property.
-
From under the Host Property on Edgecast, click Create Property.
-
From the Property Name option, assign a name to your property.
-
Click Import an existing project.
-
Click on your project’s web application framework.If your desired framework is not listed, then you will need to create a property without automation.
-
If you have not already connected your Github account to Edgecast, then you will need to do so now.
- Click Connect to Github.
- Sign in to your account using either a passkey or your user name and password.
- When prompted, authorize Edgecast access to your Github account.
-
From the Select a Repository option, select your project’s repository.
-
Click Create Property.
-
As a part of the property creation workflow, Edgecast Bot generates a pull request called
Edgecast Initthat adds both our service to your project and a Github workflow for the automation of branch previews and deployments.Review this PR and merge it into your main branch.

Creating a Property (CLI without Automation)
Use a CDN-as-code approach to CDN configuration with any existing project.
-
From the Edgecast Console, click New Property.
-
From under the Host Property on Edgecast, click Create Property.
-
From the Property Name option, assign a name to your property.
-
Verify that the Create using CLI option is selected.
-
Click Create Property.
-
A quick start page will display a npx command. Initialize your property by running this command from your project’s root directory.
Creating a Property (Sample Project)
We provide sample Next.js, Nuxt3, Astro, Remix, Qwik, and Vue projects through which you may learn how to optimize site delivery. This option requires you to connect your Github account to your Edgecast account.
-
From the Edgecast Console, click New Property.
-
From under the Host Property on Edgecast, click Create Property.
-
From the Property Name option, assign a name to your property.
-
Click Start from a template.
-
Click on your project’s web application framework.If your desired framework is not listed, then you will need to create a property without automation.
-
If you have not already connected your Github account to Edgecast, then you will need to do so now.
- Click Connect to Github.
- Sign in to your account using either a passkey or your user name and password.
- When prompted, authorize Edgecast access to your Github account.
-
Click Create Property. Edgecast will now perform the following actions:
- It will create a property.
- It will create a Github repository for this property.
- It will add all of the project’s files to this Github repository.
- It will deploy the sample project to Edgecast. Once the deployment completes, you may follow the URL displayed under the URL label to load the sample site.
-
Optional. Clone the Github repository to your local drive. Test different configurations by committing changes to this repository. Edgecast will automatically deploy those changes.
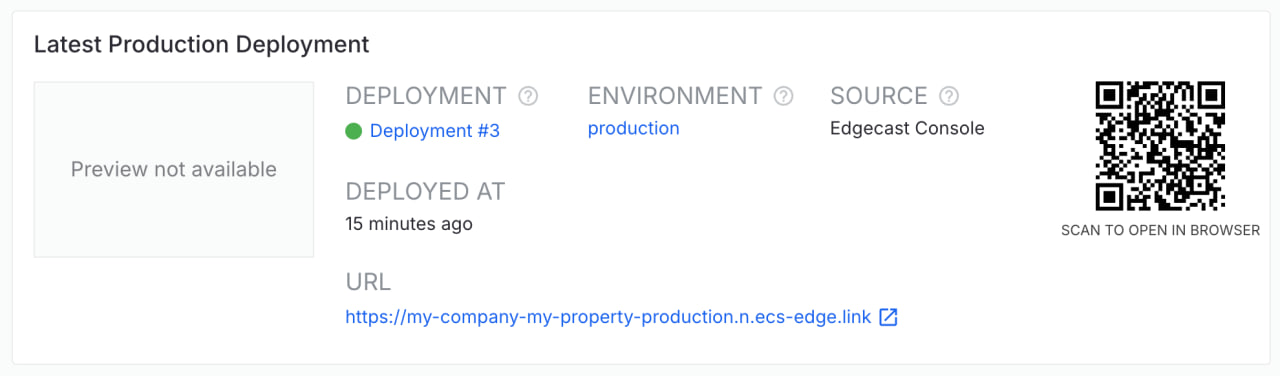
Step 3: Test Your Property
Once your property is successfully deployed to the Edgecast network, a URL will appear within the Latest Production Deployment section. Follow that link to preview your site behind Edgecast.
Next Steps
Congratulations on setting up a basic property on Edgecast!
You are now ready for:
-
Collaboration. If you plan on collaborating with other team members, then you should create an organization. After which, you will need to create a property for that organization.
-
Edgecast Security. We automatically provide distributed denial-of-service (DDOS) protection to traffic that runs behind Edgecast. Apply additional protection to your organization’s web applications and APIs through our Web Application Firewall solution. Contact your account manager or our sales department at 1 (866) 200 - 5463 to upgrade your account.
-
Create environments to match your software development workflow. Each environment provides site previews that allow QA testers, code reviewers, and other stakeholders to immediately try out newly introduced changes before they are introduced into your production environment.If you are using our Github automation workflow, then we will create environments for you. You do not need to create additional environments.
-
CDN-as-code: If your new property uses CDN-as-code, then you will need to define CDN behavior within a file (
routes.[js|ts]) stored alongside your code. Additionally, if this project uses a JavaScript framework, then you can use Edgecast Sites. to improve your website’s performance by using our cloud workers to quickly render server-side content in a scalable manner. -
Edgecast Console: If your new property is for a site hosted on your web server(s), then you should fine-tune your origin configuration.For example, you can enable Server Name Indication (SNI) on an origin configuration or shield it from requests to reduce network bandwith usage and the load on your web servers.
-
Optimize website performance by defining a caching policy, predictive prefetching, and other edge logic through Rules.
-
Gain performance insights through which you can fine-tune your configuration through our Observability solution.
-
Speed up development by quickly iterating through different variations of your site through our Traffic Splitting solution.